by: Bryan Litz
This article will teach you all the basics of ammo reloading. Like many ‘How To’ guides, this section will get you started on the right path but is not intended to be an all encompassing and authoritative source on the subject, but a broad overview of how to safely and effectively assemble ammunition for your rifle. The necessary steps are presented in a logical order, along with unnecessary, or optional steps that one may take to achieve better results. You will notice that many of the optional steps require the use of optional tools and equipment. I’ll do my best to point out which practices are necessary, which are recommended, and which are potentially helpful in terms of precision and safety.
This article was originally published in the Berger Bullets Reloading Manual and has been updated and modified for content. Before you start, make sure you read our Reloading Disclaimer and Cautionary Statement.
Getting Started
The ammo reloading process consists of the following steps:
- Cleaning and lubricating the case
- Resizing and decaping the case
- Trimming the case (not necessary on every firing)
- Priming the case
- Dispensing a measured powder charge into the case
- Seating a bullet
Your success, enjoyment, and safe practice of handloading depend on your understanding and comfort level with the process. The following sections are designed to give you the necessary understanding and confidence with the previous 6 steps listed above.
Cleaning and lubricating the case
The reason for cleaning the brass is to prevent a build-up of sludge in your resizing die which can prevent it from working properly. There are many ways to clean your brass, the following are a few examples of common ways to clean fired brass:
- Manually with steel wool or a rag with cleaner
- A vibratory tumbler with wet or dry media
- Ultrasonically with fluids
As an optional step, you can clean out the carbon from the primer pockets. This is not necessary, but some shooters believe it’s necessary for consistent primer seating.
After the brass is cleaned to your satisfaction, it must be lubricated before the resizing process. There are several methods for lubricating casings. The two primary methods are rolling the cases on a lubricated pad, and spraying them with a case lubricant.
If the cases are not lubricated properly, they will become stuck in the resizing die. This stops your reloading dead in its tracks because with a case stuck in your die, you can’t continue the process. Make sure the case neck and body have a thin film of lubricant for easy passage thru the resizing die.
Using too little lubricant will result in difficult operation of the press. If you use too much lubricant, it will build up inside your die and actually put dents in the shoulders of your cases. It will take a little experience and trial and error to determine what type and amount of lubricant works best for you and your particular casings, dies, and press.

Figure 1. Too much lubricant will result in dents in the case shoulder.
Resizing and decaping the case
When a brass case is fired, the internal pressure expands the case to fill the chamber of the rifle. This happens by design, as the expanded case creates a gas seal which prevents dangerous gas leakage out the breach end of the firearm. When the empty casing is ejected after firing, it’s slightly larger than it was going into the chamber. The expanded cartridge will no longer hold a bullet in its neck, and may be difficult to chamber until it’s resized by the handloader.
Resizing is done on the ammo reloading press with resizing dies. The case is pressed up into the sizing die which squeezes the casing down so that it will hold a new bullet and fit back in the chamber of the rifle.

Figure 2. Basic Resizing.
The basic approach is to resize the case using a full length resizing die. This will return the casing to its original factory dimensions. The case goes up into the die and has its neck and body squeezed down. In the process, the decaping pin knocks out the spent primer. When the case is extracted from the die, a button will slightly expand the neck to insure it has the proper inside diameter for gripping the bullet. For total full length resizing, the die is screwed into the press until it contacts the shell-holder with the ram in the up position. Backing the die off the shell-holder slightly is a way to partially resize the case.
For potentially increased precision, many handloaders take deliberate control over how much resizing is done to various parts of the case. For example, you might be able to resize only the neck of the case, and not the body which will create a tighter fit between the cartridge body and the chamber. The tight fit provides the bullet with better alignment to the bore, which may improve precision. Some dies have interchangeable bushings that you can select to control the exact amount of neck sizing. Choosing various diameter bushings allows you to control neck tension, a variable that’s known to affect precision.
After resizing, there’s a light film of lubricant that should be wiped from the case. This can be more important than it seems. If the thick coat of lubricant is left on the casing and the loaded rounds are exposed to a dirty environment they become coated in grit which may prevent the rounds from chambering, or result in the rounds getting stuck in the rifle.
Trimming the case
During the firing and resizing process, it’s normal for the brass casing to elongate somewhat from the fire forming and reshaping processes. If the case grows too long, it can cause a dangerous situation. If the casing grows too long, it can result in the chamber effectively crimping the case neck into the bullet as the bolt is closed. Crimping the bullet in such a manner can cause a dramatic and dangerous increase in pressure. This is avoided by trimming the brass casing after it grows too long. The tables of load data for each cartridge contain the max length, and trim length of a casing. The max length is the length that you should not let the casing exceed. The trim length is how long you should set your trimmer to trim the case.

Figure 3. Case trimming.
Case trimmers like the one shown here are pretty simple devices. Setting up the trimmer to cut the right amount from the case is a trial and error process. Read the instructions for your trimmer to learn how best to use it to achieve the trim length for your casing.

Figure 4. Chamfering tool.
Regardless of the trimmer used, after the case is trimmed to length, the mouth of the case will be somewhat flattened from the cutter. This creates a problem for seating bullets and chambering the round. If the case mouth is severely flattened, it can bite into the bullet and cause a dangerous high pressure situation. At the very least, the case mouth can scrape shavings off the bullet as it’s seated which is bad.
To avoid the consequences of a flattened case mouth, an inside and outside chamfering tool is used. This simple hand tool will chamfer, or bevel, the edges of the case mouth after trimming so that a bullet seats smoothly into the neck.
After the case is trimmed and chamfered inside and out, it’s a good idea to re-measure the length of the case to insure that it’s under the max length and at or slightly above the trim length.
Note that trimming should be done after resizing because the resizing operation can cause the case to grow a little in length.
Priming the case
There are many tools available for inserting a live primer into the case. There are hand priming tools, bench mounted priming tools, priming dies, priming tools built into the press, and more. Any of these methods of priming can be acceptable.

Figure 5. Hand priming tool
The best methods of priming are those that allow you to best feel the primer seat to the bottom of the primer pocket. This includes the good hand priming tools and bench mounted units. It’s also important for consistency of ignition and precision to have the primer seated squarely in the pocket. One trick for insuring the primers are seated squarely is to seat the primer, then rotate the case ½ turn and press it again with the seater.
When seating primers, it’s important that the primer is gripped tightly by the pocket. If the primer is loose in the pocket, it means that piece of brass has been over-expanded from excessive pressure and shouldn’t be fired again.
Selecting, measuring, and dispensing powder
Selecting, measuring, and dispensing powder is a very important part of ammo reloading and will be discussed at length.
Your selection of powder for a given cartridge should be limited to those choices provided in the loading data contained in this manual. If you have a powder type that is not listed for use in a particular cartridge, DO NOT USE IT. There is a reason why it wasn’t included, and without knowing how much powder to use, you can create a very dangerous situation.
Once you’ve selected a powder to use, start with the minimum listed charge and work up carefully from there, not to exceed the maximum charge. See the chapter on statistics for a procedure for testing loads.
There are two basic ways to measure your powder charges: by weight or by volume. Weighing powder on scales is the more accurate way, and for the time being we’ll discuss the proper set-up and use of scales.

Figure 6. Balance beam scale
There are balance beam and electronic scales, both with their pros and cons which are discussed in the chapter on reloading components. For the purposes of this discussion I’ll focus on the balance beam scale.
It’s very important to understand the operation of your particular scales, so you should read the user’s manual thoroughly. Not following the proper procedure for zeroing your scales can result in mistakenly dispensing the wrong amount of powder which can be dangerous.
Regardless of the type of scales you’re using, you should place the unit on a flat surface, with plenty of light. Make sure there are no air currents in the area (perhaps from a heater or air conditioning vent) because the moving air could aggravate your efforts to weigh the delicate charges.

Figure 7. powder weighing set up
After the scale is set up in an acceptable place, it has to be zeroed. Again, each scale will have its own procedure for how to zero it so you should refer to the instruction manual. When the scale is zeroed, carefully move the weights on the beam to indicate the desired charge that you want the scale to indicate. After the scale has been zeroed and set up for weighing a specific charge, it’s time to start moving the powder.
Each individual will develop their own preference for the tools and procedures used to weigh powder. Typically, the powder is spooned into the pan from a small bowl until the charge gets close to the desired amount. Then the final few granules are trickled into the pan with a powder trickler. When the needle settles on zero, the pan is lifted from its holder, careful not to disturb the delicate beam, and poured gently into a funnel and into the case. Watch carefully as you pour the powder to insure that none of the granules are bouncing or spilling out of the funnel or case. The point is to get the entire weighed charge into the case; no more and no less.

Figure 8. Pouring the powder.
After the powder is dispensed, it’s best to move the case directly to press for bullet seating. Some individuals like to charge all their cases and keep them in a tray, then seat the bullets all at once. Doing so allows the potential for unseen debris to fall into the cases, and bumping the tray could spill some powder from all the cases. If the bullet is seated immediately after the powder is poured, it reduces the chances of an accident, seen or unseen.
Bullet seating
Precision can be highly dependent on the bullet seating depth. Having the flexibility to seat the bullet to the correct depth for a particular rifle is one of the big advantages of handloading.
In order to experiment to find the best seating depth, the first thing to do is establish the seating depth which results in the bullet just barely touching the riflings when the round is chambered. All seating depths will be referenced to this point as either jump or jam distances. For example, if the bullets are said to be jumping 0.015”, it means the bullet is seated so that when the round is chambered, the bullets bearing surface is 0.015” back from the start of the riflings in the barrel. On the other hand, if the bullets are said to be jammed 0.005”, it means the bullet is seated so that it’s being forced 0.005” into the riflings when the bolt is closed.

Figure 9. Hornady Lock-N-Load
There are several techniques that can be used to find the OAL of a round with the bullet touching the riflings. The most convenient way is to use the Hornady Lock-N-Load (formerly Stoney Point) overall length gauge shown in Figure 9. Following the instructions for using this tool will allow you to accurately establish the OAL of a round with the bullet seated to touch the riflings. This OAL should be recorded and all seating depths that you experiment with should be referenced to it.

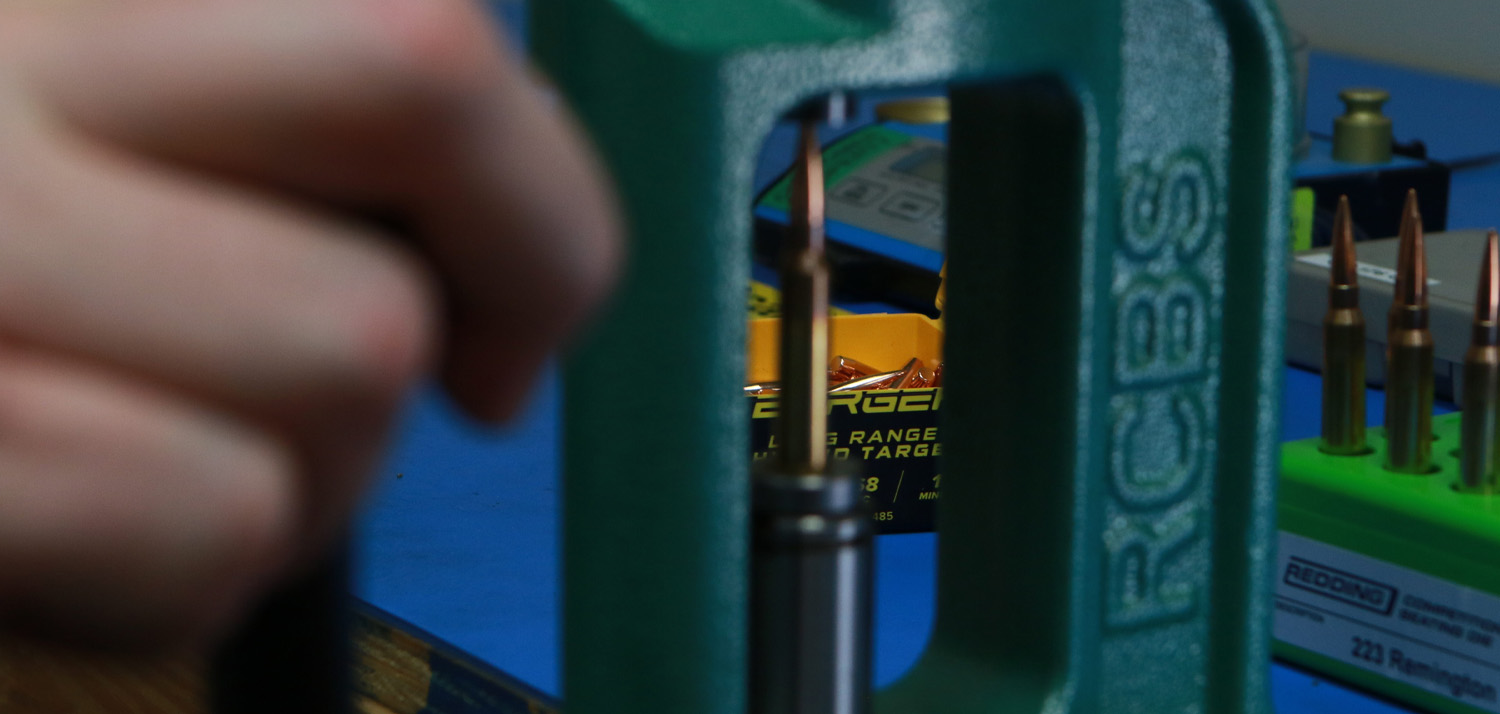
Figure 10. Bullet Seating
There are several practical considerations to make regarding seating depth. For example, you may find that the seating depth which produces the best precision in your rifle results in a round that’s too long to cycle thru your rifles magazine. If this is the case, you would have to make a choice between best precision and feed-ability.
Another consideration is if you find the most precise seating depth is with the bullet jammed into the riflings. In this case, it’s possible for the bullet to become stuck in the riflings if you have to eject the loaded round. This usually results in spilling powder into the rifles action, and leaving the rifle disabled until the bullet is dislodged with a cleaning rod and the powder is cleaned out of the action.
If you’re using a relatively short bullet in a chamber that has a long throat, you may end up with a seating depth that’s so long that the bullet is barely held in the case. There is no absolute minimum amount of bullet that must be seated. You just want enough of the bullet seated so that it can’t be dislodged accidentally during storage and transport.
With these practical considerations in mind, the handloader should proceed to test a range of seating depths in order to find the most favorable precision. You will find some bullets to be relatively insensitive to various seating depths, while the precision of other bullets might be dramatically affected by small changes in seating depth. See the chapter on advanced reloading and statistics for guidance on designing tests to find the best seating depth.
Once the proper seating depth has been established and the seating die locked into place, seating the actual bullets is a relatively simple task. The bullet is placed on top of the case mouth with your fingers, and the press is raised, pushing the case all the way into the seating die.
Some brands of bullets have a cannalure, which is a band around the bullet which the case mouth can be crimped into. Berger bullets do not have cannalures so you should never crimp the case mouth on a Berger bullet. Doing so could result in dangerous chamber pressure.
Advanced Practices
The above was a quick overview of the basic and necessary processes required to reload ammunition. All of that just scratches the surface of what’s possible within the realm of handloading ammunition.
If one were to strive to assemble the best, most uniform and consistent ammunition possible, the additional steps would include: cutting the primer pockets and flash holes to uniform depth/diameter, deburring the inside of the flash holes, sizing trimming and camfering the case necks to the same length prior to loading, turning the case necks to a uniform thickness, and sorting the brass by weight and/or internal volume. Likewise bullets can be sorted by any number of external measurements, as well as primers. Powder is already measured either by weight or volume, but there are always more precise ways to measure.
The practices mentioned in the above paragraph each have a multitude of tools available for accomplishing each step, and will make more or less of a difference in different shooting applications. For example, if you’re reloading for a lightweight factory hunting rifle that’s capable of 1.5″ groups at 100 yards, uniforming primer pockets is pretty much a waste of effort. However, a world class Benchrest shooter wouldn’t skip that step of brass prep because he’s competing in an event where 0.010″ difference in average group size can mean the difference between winning and not placing.
It’s important to think about the improvements that are likely to result from certain advanced reloading practices. Are the extra steps worth the work for your application? The chapter on statistics explains how you can analyze your shooting results and tell if a particular practice makes a real difference or not.
Many good books have been written on the subject of advanced reloading. Rather than trying to contain all those details in a single chapter of a reloading manual, here is a list of recommended books where the interested reader can learn more about advanced handloading practices:
- Handloading for Competition – Zediker
- Extreme Rifle Accuracy – Mike Ratigan
- Prone and Long Range Rifle Shooting – Nancy Tompkins
Summary
The previous pages are the most fundamental steps required to reload metallic cartridges. There are many variations of procedures and equipment, but no matter what you’ll be completing the 6 basic steps one way or another. One exception is if you purchase new, unfired brass. In that case you won’t have to decap and resize the brass, but it’s still a good idea to run the case mouths over a button or mandrel to round them out because they get dented during shipping.